Running PHP 5.6 on AlmaLinux 8/9 can be achieved using Docker with CyberPanel. This tutorial guides you in setting up a PHP 5.6 Docker container, enabling legacy applications to run smoothly while maintaining a secure, modern server. Perfect for hosting older projects without compromising system integrity.
PHP 5.6, released in 2014, is now considered outdated, and many operating systems no longer support it due to security concerns and the availability of newer PHP versions. Here’s the status of PHP 5.6 support across several major Linux distributions:
If you’re running any of the latest versions of these operating systems—Debian 10 and later, Ubuntu 18.04 LTS and later, CentOS 8, or AlmaLinux 8 and 9—you will no longer find official support for PHP 5.6. Upgrading to a newer PHP version, such as PHP 7.4 or PHP 8.x, is highly recommended for better performance, security, and compatibility with modern web applications.
If you need to run a Laravel/WordPress or even a basic website running on php56
Let’s use domain oldapplication.com as the domain you are going to set up the old application for.
A website should be created for oldapplication.com and a database as required in Cyberpanel.
https://myserver.com:8090/docker/manageImagessajetek/php56-70-71-72-73-ols-ssl-centos7” or “sajetek/php5.6-ols-ssl” or “sajetek/php5.6-apache2.4-ssl” If you prefer Apache backend. (this is not too important as we are only using it for serving)Read the overview of both here to know which modules are enabled by default:If you are using sajetek/php56-70-71-72-73-ols-ssl-centos7: then as root user execute this mysql query:ALTER TABLE cyberpanel.dockerManager_containers CHANGE image image VARCHAR(64) CHARACTER SET latin1 COLLATE latin1_swedish_ci NOT NULL;
/” but for Laravel applications, you want to set this to “/public” so that the public folder is your root directory.If you used sajetek/php5.6-apache2.4-ssl, then set DOCUMENT_ROOT to “/var/www/html” or for Laravel applications, you want to set this to “/var/www/html/public” so that the public folder is your root directory/usr/local/lsws/Example/html” and Source should be set to your document root which is usually “/home/oldapplication.com/public_html”https://myserver.com:8090/websites/oldapplication.com and click on “vHost Conf”REWRITERULE ^(.*)$ https://dockeroldapplication443/$1 [P]” to make it look similar to the following:rewrite { enable 1 autoLoadHtaccess 1 #ENFORCE REDIRECT TO HTTPS REWRITERULE ^/(.*)$ https://%{SERVER_NAME}/$1 [R=301,L] REWRITERULE ^(.*)$ https://dockeroldapplication443/$1 [P] }
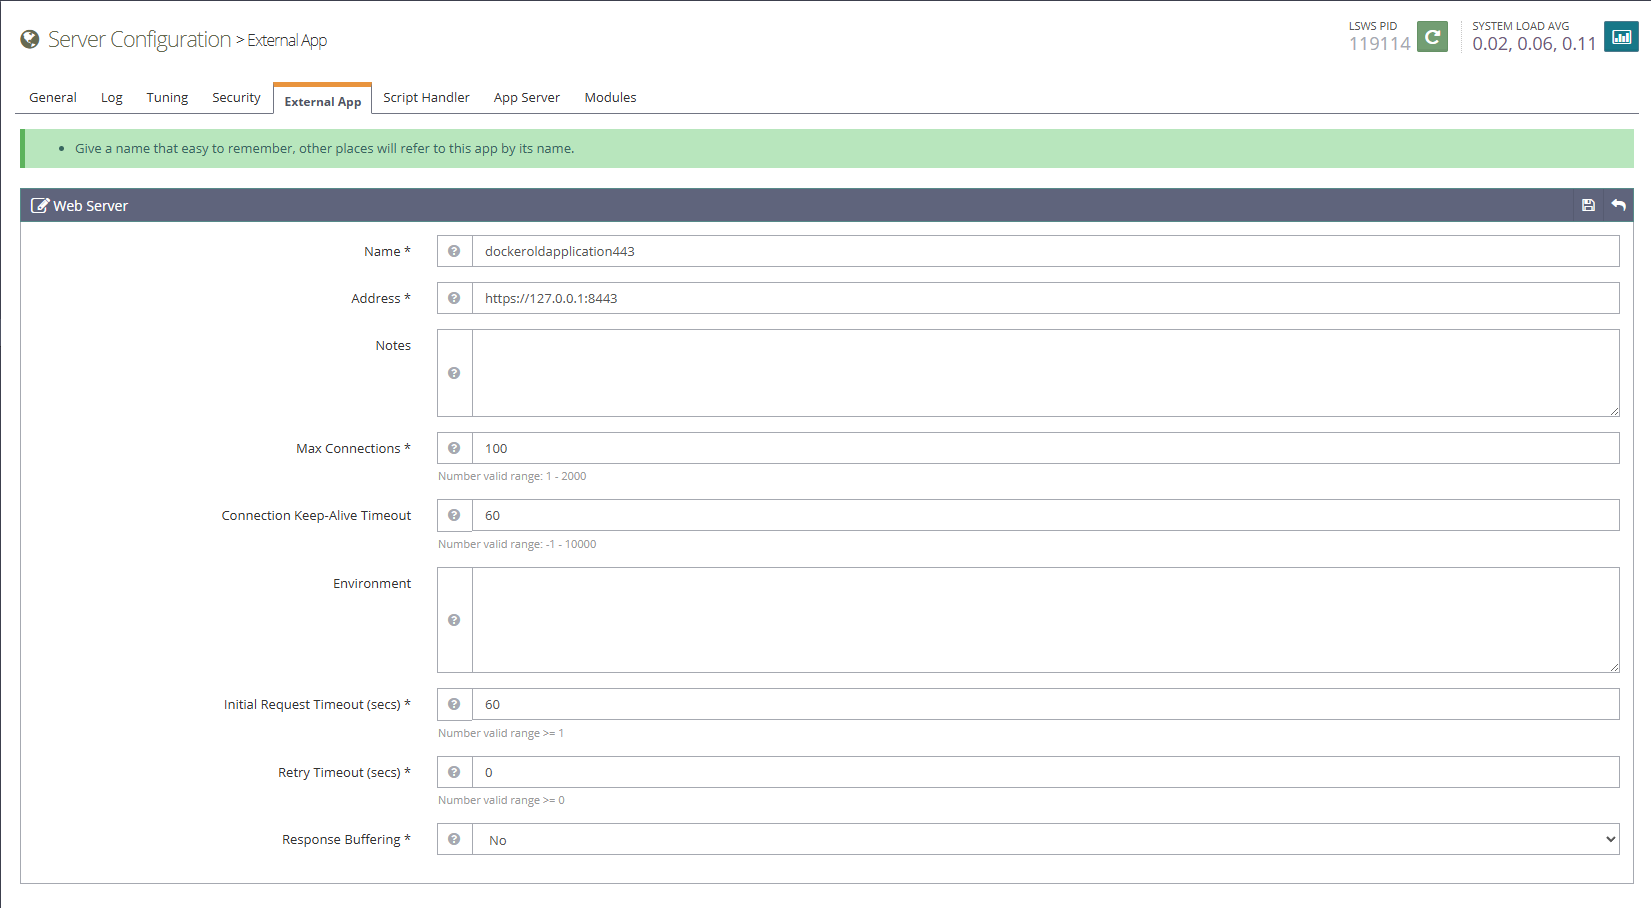
extprocessor dockeroldapplication443 {
    type proxy
    address https://127.0.0.1:8443
    maxConns 100
    pcKeepAliveTimeout 60
    initTimeout 60
    retryTimeout 0
    respBuffer 0
}
https://myserver.com:8090/dataBases/listDBs and select your domain. Click Manage for the database for your application and set the IP address to “172.17.0.2” and click “Save Changes”This allows you to run your application/website on a proxy to my docker image which runs on CentOS 7 and php5.6.
Your website files and databases remain on your host server which can be managed via backups as needed.